Fix Drywall Crack With Caulk
How to Repair Ceiling Cracks. Ceiling cracks can be unsightly and annoying, but repairing them is not as difficult as it might seem. Fixing ceiling cracks in either.
- How to Fix Drywall Cracks With Stress Crack Tape. Houses shift over time and with extreme changes in weather. Shifting can cause stress cracks in the drywall, most.
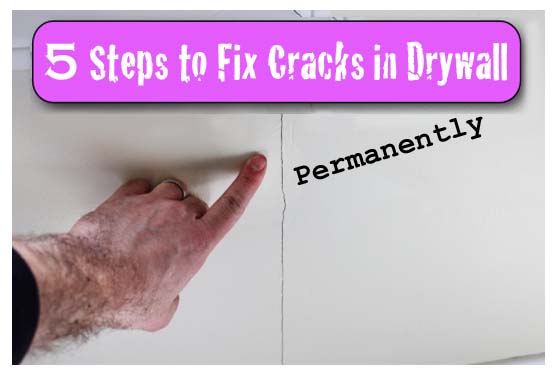
- Do you have a crack in your drywall that keeps coming back. Today s post will help you fix this annoying problem in 5 easy steps using 3M s Patch Plus Primer.
Apr 06, 2014 How to fix a crack in the Wall Part 1 In this video, I show you how to fix a crack in the wall. Drywall repair tips Like me on Facebook.
The smallest crack in a popcorn ceiling can appear huge and distract from the look of the room. You don t have to pay a professional to fix a cracked popcorn ceiling.
Visitors to thisoldhouse.com asked for help with dinged, gouged, and cracked walls. Here s an easy way to get a smooth surface that lasts.
Jul 13, 2009 Caulking Tips: How to Caulk a Crack in Your Wall You can walk the walk, but can you caulk the caulk. We don t know what that means either, but master.
Do you have a crack in your drywall that keeps coming back.
Today s post will help you fix this annoying problem in 5 easy steps using 3M s Patch Plus Primer.
This weekend I was cleaning out the guinea pig cage that sits in our living room did you know guinea pigs can live from 5 to 8 years, what the and noticed a crack in our wall under the window.
Apparently the previous homeowners tried to fix it since there was evidence of old joint compound around the crack.
Dealing with old rental homes has taught me a thing or two about drywall and plaster. After reading this post I guarantee you ll be able to permanently fix any drywall crack in no time.
2 to 3 episodes of Big Bang Theory
That s not a bad supply list. My grocery list puts it to shame and is far more expensive and that s without buying Dogfish Head IPA beer.
Let s get started and eliminate your cracked drywall
Step 1: Apply Fiberglass Mesh Tape to Your Drywall Crack
One of the biggest mistakes anyone can make is to just add joint compound or spackling to the drywall crack. Over time the crack will come back because the compound or spackling will never win the fight between it and your house settling. It s like Pee Wee Herman challenging Mike Tyson.
Adding fiberglass mesh drywall tape to the crack is like giving Pee Wee anabolic steroids.
Center the tape on the crack. Since one side is sticky you can place it on the wall and get your Patch Plus Primer ready.
Step 2: Add a Thin Coat of Patch Plus Primer to the Drywall Tape
3M Patch Plus Primer is great for repairing cracks or holes in drywall because it doesn t require a primer coat like traditional joint compound. So you save time and money
Big Tip: when you buy 3M Patch Plus Primer at the hardware store make sure it hasn t been opened. Otherwise, it might be bad and unusable. The same principle applies to any product that comes in a container including pre-mixed joint compound.
Apply a thin coat of Patch Plus Primer over your mesh tape. Just enough to fill the voids and make the tape adhere even more to the wall.
If your crack is long say 2-5 feet I recommend applying the patch plus primer to the tape with a 6 inch drywall knife. To do this, you ll have to scoop some of the Patch Plus Primer into a mud pan to use the larger knife.
Add the spackling by starting in the middle of the tape. Spread the spackling on the tape in a downward motion from the center. Then go back and add the rest of the spackling moving upward from the center of the tape.
This stretches the tape along the crack and prevents it from wrinkling.
Allow this coat to dry for 30 minutes and watch 1 episode of Big Bang Theory.
Step 3: Add Your Second Coat of Patch Plus Primer
The reason for the light coat of 3M Patch Plus Primer in Step 1 is so you don t have a big hump on your wall where the tape is located.
Use your 6 inch knife to put on a second coat of the Patch Plus Primer.
Make the width of the new coat be two inches to the right and 2 inches left of the center of the tape.
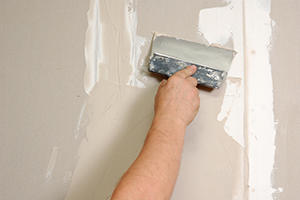
Then smooth out the spackling with your 6 inch drywall knife like you did in Step 2 always starting in the center and moving toward the ends.
The key tip I have here is to apply slightly more pressure on the side of the knife that touches the drywall. This pressure change will feather the Patch Plus Primer and blend it into the existing drywall.
Depending on your skill and how perfect you want the wall you may have to apply a 3rd coat.
Step 4: Lightly Sand the Patch Plus Primer
For small drywall repair jobs I like to use a fine grit sanding sponge to feather the edges of spackling or joint compound. Lightly move the sanding sponge in a circular motion over the patched area. Circular motions will help blend the patch into the drywall.
It will take a well trained eye to notice where you made your repair.
The best part about the 3M Patch Plus Primer is that you don t have to prime it.
Patch Plus Primer can be painted over after 30 minutes. Use a good quality paint brush or roller. I ve been using a Purdy 2 inch brush for 2 years now and while the handle is rusted, the bristles look fantastic. I always rinse my brush in warm water then wrap it in Glad Press N Seal. Brittany also has a great tutorial on keeping your paint brushes looking new.
The wall looks pretty darn good, wouldn t you say.
I m gonna go out on a limb here but I think even Dr. Evil would be pleased with this job.
Now you know the secret to permanently fixing a drywall crack. This entire project can be done in one afternoon or over the weekend without breaking a sweat.
Brittany also has a great tutorial on how to finish drywall seams.
Do you have any burning drywall questions. Ask away in the comment section below and I d be happy to help